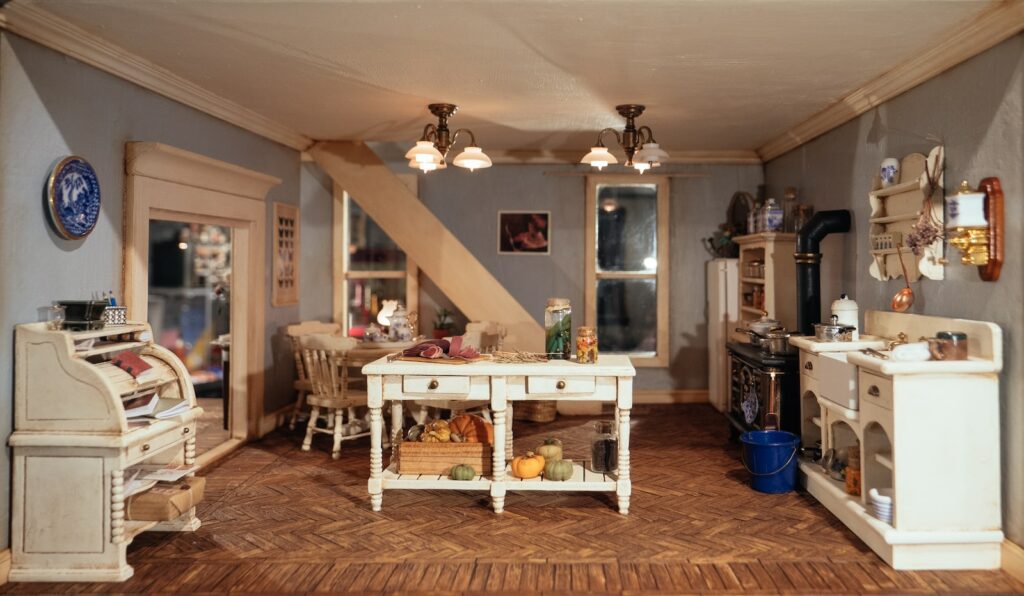
The Ultimate Guide to Building Your Dream Dollhouse: Unleash Your Inner Artist
Are you ready to dive into the enchanting world of dollhouses? In this guide, we’ll help you unleash your inner artist as we take you through the exciting process of creating your dream dollhouse.
From choosing the perfect materials and planning your design to adding intricate details and finishing touches, we’ll cover everything you need to know to bring your miniature masterpiece to life.
Get ready to embark on a creative journey that will ignite your imagination and provide a fun and fulfilling hobby you can enjoy for years.
The art of creating dollhouses has a rich history dating back centuries, with the earliest known examples dating back to the 16th century. Over the years, dollhouses have evolved from simple wooden boxes filled with miniature furniture to the elaborate and highly detailed works of art we see today. This guide will give you the tools and techniques needed to create your own dollhouse, whether you’re a seasoned miniature enthusiast or a complete beginner.
As you follow along with this guide, you’ll discover the joy of designing and building your very own miniature world. Creating a dollhouse is not only a fun and rewarding experience, but it also offers a unique opportunity for self-expression and personal growth. So let’s get started on this magical journey together!
Choosing the Right Materials
The Foundation: Wood, Cardboard, or Plastic?
- Wood: Wooden dollhouses are the most traditional choice and provide a sturdy and long-lasting foundation. They can be made from plywood, MDF, or hardwood, with each material offering its benefits and drawbacks.
- Plywood is the most affordable option and is relatively easy to work with. However, it may be prone to warping and splintering.
- MDF (medium-density fiberboard) is denser and more stable than plywood, but it can be more challenging to work with due to its weight and the need for proper ventilation when cutting or sanding.
- Hardwood is the most expensive option but provides a high-quality, durable, and beautiful end product. It can be more challenging to work with for beginners due to its density and the need for specialized tools.
- Cardboard: A more affordable and lightweight option, cardboard can create surprisingly sturdy dollhouses. It’s a great choice for those looking to experiment with different designs or those on a tight budget.
- Plastic: Plastic dollhouses are typically pre-made and can be purchased as kits. They are easy to assemble and often include molded details. However, they may lack the charm and character of handmade wooden or cardboard dollhouses.
Glues and Adhesives
- PVA glue: A versatile and widely available option, PVA glue is perfect for bonding wood, cardboard, and paper.
- Hot glue: This quick-drying adhesive is excellent for securing larger pieces and making small repairs.
- Super glue: Use this strong adhesive sparingly for delicate or intricate work, as it dries quickly and can be difficult to remove.
Planning Your Design
Finding Inspiration
- Books and magazines: Browse books and magazines dedicated to dollhouses and miniatures for inspiration and ideas.
- Online resources: Websites, blogs, and social media platforms offer many ideas and tutorials from fellow enthusiasts.
- Museums and exhibitions: Visiting museums or miniature exhibitions can provide a glimpse into the rich history of dollhouses and inspire you with intricate details and craftsmanship.
Sketching Your Vision
- Scale: Choose a scale for your dollhouse, with 1:12 being the most common. This means that one inch in your dollhouse represents one foot in real life
- Scale: Choose a scale for your dollhouse, with 1:12 being the most common. One inch in your dollhouse represents one foot in real life. Other popular scales include 1:24, 1:48, and 1:6. Remember that the scale you choose will determine the size of your furniture, accessories, and other details.
Creating a Blueprint
- Room layout: Plan the layout of your dollhouse, including the number of rooms, their arrangement, and any additional features like hallways, staircases, or balconies.
- Wall and floor finishes: Decide on the materials and colors you want for the walls and floors of each room, such as wallpaper, paint, or wooden panels.
- Windows and doors: Plan the placement of windows and doors, and consider the style and size of each.
Building the Structure
Constructing the Walls and Floors
- Cutting the material: Using your chosen material (wood, cardboard, or plastic), cut out the pieces for the walls and floors according to your blueprint.
- Assembling the structure: Secure the walls and floors with your chosen adhesive. Use clamps, masking tape, or rubber bands to hold the pieces together while the glue dries.
Adding Windows and Doors
- Frames: Create window and door frames using thin strips of wood or cardboard, and attach them to the openings in the walls.
- Glass: Use clear plastic or acetate sheets for the window panes, cutting them to size and securing them to the frames with a thin layer of glue.
- Doors: Use miniature hinges to create functional doors by attaching them to the frames.
Decorating Your Dollhouse
Painting and Wallpapering
- Preparation: Lightly sand the walls before painting or wallpapering to ensure a smooth surface. Apply a primer to wood surfaces to prevent the paint from soaking in.
- Painting: Use acrylic or latex paint for the walls, applying thin, even coats to avoid streaks or drips.
- Wallpaper: Choose a miniature scale wallpaper or print your designs. Apply adhesive to the back of the wallpaper and carefully smooth it onto the walls, removing any bubbles or wrinkles.
Flooring
- Carpet: Use fabric or felt for carpeting, cutting it to size and securing it with a thin layer of glue.
- Wooden floors: Create realistic wooden floors using thin strips of wood veneer or balsa wood. Arrange the strips in your desired pattern, and glue them in place.
- Tile floors: Use miniature tiles or print your designs onto adhesive paper. Cut and arrange the tiles, then secure them with glue.
Furnishing and Accessorizing
Furniture
- Purchasing: Buy pre-made miniature furniture in your chosen scale, or create your own using wood, cardboard, or polymer clay.
- Customizing: Personalize your furniture by painting, staining, or upholstering it to match your dollhouse’s interior design.
Accessories
- Creating: Craft your miniature accessories using materials like beads, wire, or clay, or purchase them from miniature suppliers.
- Arranging: Thoughtfully arrange your accessories throughout the dollhouse, considering the scale and proportion of each item.
Frequently Asked Questions
Q: What is the best material for making a dollhouse?
A: The best material for making a dollhouse depends on your budget, skill level, and desired outcome. Wood is the most traditional choice and provides a sturdy and long-lasting foundation, while cardboard offers a more affordable and lightweight option. Plastic dollhouses are typically pre-made kits and are easy to assemble.
Q: How do I secure the furniture and accessories in my dollhouse?
A: You can use small amounts of tacky wax, museum putty, or double-sided tape to secure furniture and accessories in place. These removable adhesives allow you to rearrange your dollhouse as desired without causing damage.
Q: How can I make my dollhouse more realistic?
A: To make your dollhouse more realistic, pay attention to details such as scale, proportions, and the arrangement of furniture and accessories. You can add lighting, curtains, and other textiles to create a cozy atmosphere. Additionally, consider adding personal touches like family photos or handmade artwork to give your dollhouse a lived-in feel.
Q: How do I clean and maintain my dollhouse?
A: To clean and maintain your dollhouse, use a soft brush or microfiber cloth to dust the surfaces gently. Avoid using water or harsh chemicals, as they may damage the materials. For delicate or intricate areas, use a small brush or cotton swab. Regularly check for any loose parts or damage, and repair as needed.


